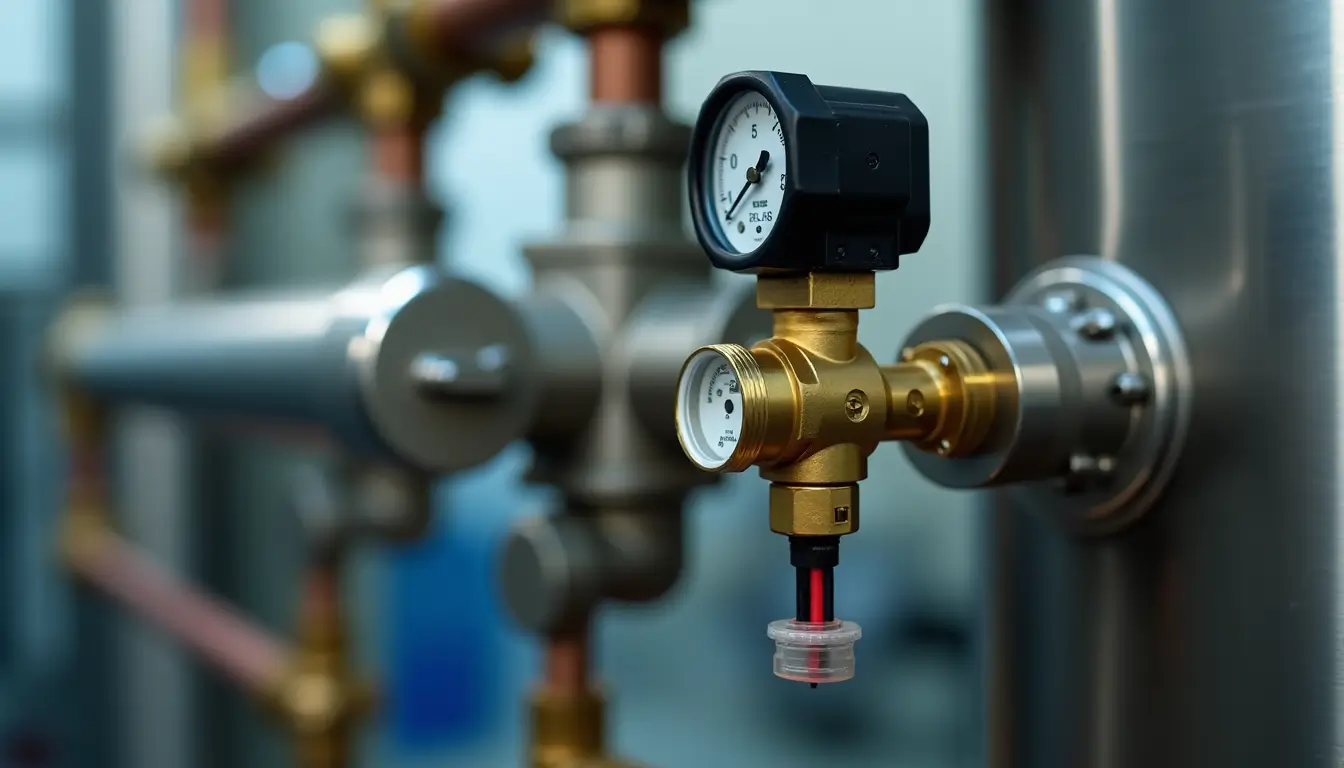
The 0533205 Pressure Switch delivers exceptional durability, lasting beyond 1 million cycles of dependable operation. This 5PSI 2Amp pressure switch has proven its value in industrial applications of all types, including HVAC systems, water pumps, air compressors, and industrial machinery.
The switch’s value comes from its solid construction with premium materials like polyester and advanced adhesives. It handles extreme conditions well and works reliably in high temperatures and corrosive environments. These features make it crucial to system safety and help prevent dangerous pressure changes.
This article provides everything you need to know about the 0533205 Pressure Switch. You’ll learn how to install, calibrate, and troubleshoot it properly. The information here helps experienced professionals and newcomers to use pressure switch systems to keep their equipment running at its best for years to come.
Understanding the 0533205 Pressure Switch Components

The 0533205 Pressure Switch uses a sophisticated pressure-sensing mechanism with a diaphragm or piston element at its core. This sensing element reacts to applied pressure and triggers electrical contacts through amplifying levers.
Core Components and Their Functions
Several essential components work together in this pressure switch. A microswitch connects to the sensing element and converts physical pressure changes into electrical signals. The operating pin connects mechanical movement to the microswitch, while the range spring sets pressure thresholds. A protective housing shields these internal components from external elements to ensure reliable performance.
Technical Specifications and Operating Parameters
This 0533205 Pressure Switch model functions as a 5PSI 2Amp pressure switch. The switch keeps the pressure within safety limits through adjustable setpoints. Its electrical ratings can handle heavy loads, making it perfect for electronic systems of all types. The switch’s durability stands out, with a rating of over 1 million operational cycles.
Comparison with Other Pressure Switch Models
The 0533205 Pressure Switch stands apart from other models with unique characteristics. Here’s how it matches up against similar models:
| Feature | PS61 Series | PS11 Series | 0533205 |
| Set Points | 10-4,350 psi | 0.75-15 psi | 5 PSI |
| Max Temperature | -40°F to +250°F | -40°F to +250°F | High temperature resistant |
| Housing Material | Zinc-plated Steel | Brass | High-grade materials |
The 0533205 Pressure Switch delivers superior accuracy and faster response times than standard models. Advanced sensing technology and reliable construction make it a dependable choice for industrial applications of all sizes.
Professional Installation Guidelines
The 0533205 Pressure Switch needs careful installation that follows safety protocols and is executed precisely. Each step matters to achieve the best performance and avoid system failures.
Site Preparation and Safety Considerations
Before starting, you must depressurize the system and disconnect all power sources. Choose an installation spot that’s easy to reach for maintenance but protected from harsh conditions. Make sure the pressure ranges match your system’s needs, and check if the process media works with wetted materials.
Step-by-Step Installation Process
You’ll need specific tools to start. Get your wrenches, screwdrivers, and pressure gauge ready. Here are the key steps you need to follow:
- Use recommended hardware to mount the pressure switch on a stable surface
- Put Teflon tape around the threads clockwise, or use pipe thread sealant for a good seal
- Hook up the switch to the correct pressure port and make sure the seals are tight to stop leaks
- Connect the electrical terminals as shown in the manufacturer’s diagram
- Double-check all connections and make sure everything’s adequately insulated
The switch needs to be mounted vertically so the diaphragm moves correctly. Use two M5 screws at least 50mm long to attach it securely.
Post-Installation Testing
After testing thoroughly after installation, everything will be confirmed to be working correctly. Start by slowly adding pressure to the system and look for leaks around the switch. Here’s what you need to check:
- Watch the pressure gage to see if the switch kicks in at the proper pressure levels
- Make sure electrical connections stay tight during operation
- Write down all installation details, including pressure settings and when you installed it
Regular checks help keep everything running smoothly. Look out for wear, rust, or damage to keep it reliable long-term. Give any loose connections one final tighten, and do a full leak test before you finish up.
Calibration and Configuration
Fine-tuning the 0533205 pressure switch will ensure perfect performance and system safety. A properly calibrated pressure switch requires the right equipment setup and systematic adjustment procedures.
Original Calibration Procedures
Calibration requires specific equipment: a calibrated pressure source, a multimeter for electrical measurements, and appropriate documentation tools. The calibration environment should stay at 23 ±5°C with humidity tiers between 20% and 80%. The equipment needs at least one hour to stabilize before calibration.
The calibration setup involves:
- Isolating the switch from the pressure line
- Disconnecting any controlling circuits
- Connecting the pressure source to the switch input
- Attaching measurement devices to monitor switch output
- Documenting original settings for reference
Setting Pressure Thresholds
The pressure threshold adjustment identifies the switch’s normal state—either normally open or normally closed. However, adjusting it requires careful manipulation of the setpoint adjusting nut. Turn it clockwise to increase the setpoint or counterclockwise to decrease it.
The pressure switch responds through its sensing element, which expands or contracts based on pressure changes. Switch activation happens when pressure reaches the predetermined threshold and triggers the electrical contacts within. The deadband represents the pressure difference between activation and deactivation points and needs precise calibration to prevent rapid cycling.
Verification and Fine-tuning
Testing the switch’s operation under actual system conditions is part of verification. Apply pressure slowly across the operating points while monitoring the switch’s response. Capturing the exact pressure at which the switch changes state is crucial for accurate calibration.
Three consecutive trials ensure repeatability for optimal performance. Document the calibration data thoroughly, including:
- Actuation and deactivation pressures
- Environmental conditions
- Equipment used
- Date and time of calibration
After verification, replace the switch cover securely and pressure-test it using a liquid leak solution around the seal. The switch’s accuracy and reliability depend on regular calibration checks every six months.
Maintenance Best Practices
The 0533205 pressure switch needs regular maintenance to work at its best. A well-laid-out maintenance plan will give you long-lasting performance and help avoid unexpected breakdowns.
Preventive Maintenance Schedule
We designed the maintenance schedule around three time periods. Monthly checks help spot visible damage or leaks. Semi-annual calibration checks keep pressure readings accurate. The diaphragm, piston, and ports need yearly cleaning to stop debris from building up.
Good maintenance records help you:
- Share knowledge with team members
- Verify audit compliance
- Make procedures better
Cleaning and Inspection Procedures
You need to be careful while cleaning to protect sensitive parts. The first step is to seal the pressure sensor opening with Kapton tape or a protective cap. To clean external surfaces, you should use alcohol or de-ionized water with paper or swabs. Avoid using soap or similar cleaners near the sensor opening because they can damage the device.
You can clean contact points with:
- Electronic contact spray cleaner for light oxidation
- Fine sandpaper for gentle surface cleaning
- Burnishing tools with 400-grit or finer abrasive coating
Component Replacement Guidelines
You must replace components when cleaning and maintenance can’t restore proper function. Replace the pressure switch if:
- Silver or precious metal coating shows heavy wear
- Contact points show severe burning or pitting
- System cycles pressure too often due to waterlogged tanks
Safety Considerations: Before any maintenance work:
- Turn off all power sources
- Depressurize the system
- Verify the absence of current at wires
Liquids and environmental substances can harm the operation, reducing accuracy and valuable life. Regular preventive maintenance helps you spot potential damage from contamination or mechanical impacts early. Replacement parts cost between $20 and $25, making early replacement cheaper than dealing with system failure.
Comprehensive Troubleshooting Guide
The 0533205 pressure switch problems require a step-by-step analysis and accurate diagnostic procedures. A systematic approach will help you find problems quickly and fix them immediately.
Common Issues and Solutions
You should know several typical problems that this pressure switch can show. A stuck or ruptured diaphragm will appear through flapping noises or pressure readings that jump around. The switch won’t work correctly if clogged ports block airflow in the collection chamber.
Common pressure switch problems and their solutions include:
| Issue | Cause | Solution |
| Switch Won’t Close | Insufficient suction | Clean collection chamber port |
| Rapid Cycling | Waterlogged pressure tank | Drain tank or replace if damaged |
| No Response | Electrical contact failure | Test contacts with multimeter |
| Inconsistent Readings | Damaged diaphragm | Replace pressure switch |
Diagnostic Procedures
You’ll need specific tools to test the 0533205 pressure switch. Here’s what you should have:
- Digital multimeter for continuity testing
- Pressure gage for accurate measurements
- Manometer for vacuum testing
- Simple hand tools for access
Here’s how to diagnose the problem:
- Test voltage at incoming terminals to check the power supply
- Measure continuity across switch terminals
- Check vacuum readings using a manometer
- Test switch response at specified pressure thresholds
Don’t guess – write down pressure readings when the switch changes state. Your manometer readings should be higher than what’s written on the pressure switch. Lower pressure readings point to system problems you need to fix.
When to Seek Professional Help
You’ll need expert help in specific situations. Call a professional if:
- Basic troubleshooting doesn’t fix electrical issues
- Multiple components fail at once
- The system keeps cycling the pressure
Whatever your skill level, in some situations, you need professional expertise. Circuit breakers that keep tripping or electrical problems that won’t disappear mean it’s time to call qualified technicians. Professional switch replacement costs $45-$200 per hour for labor.
Safety Warning: Only certified professionals should work on 480V AC 3-phase systems. Focus on simple diagnostics and let qualified technicians handle complex electrical work.
Keep notes of all troubleshooting steps and results to get the best performance. These notes will help technicians understand what’s happened and speed up repairs. Missing information could lead to wrong diagnoses and unproductive fixes.
Conclusion
The 0533205 pressure switch is the lifeblood of industrial pressure management systems. When installed, calibrated, and maintained properly, this 5PSI 2Amp switch delivers consistent performance across millions of operational cycles.
Knowledge of the switch’s core components helps you install and configure it precisely. A detailed maintenance schedule and proper cleaning procedures extend the equipment’s lifespan significantly. Familiarity with common issues and solutions helps you resolve problems quickly and reduce system downtime.
This piece gives both novice operators and experienced technicians the knowledge they need to:
- Install safely and accurately
- Calibrate precisely
- Maintain effectively
- Troubleshoot systematically
The switch will perform at its best when you follow these guidelines regularly while keeping the system safe. Its strong construction and proper care make it perfect for all types of HVAC systems, water pumps, air compressors, and industrial applications.
Note that you’ll need professional help for complex electrical or persistent problems. Documenting maintenance activities and troubleshooting steps helps you track system performance and build long-term reliability.