Quick Summary: How to Plan New Construction Plumbing Rough-In
- Content Type: Guide
- Best For: New and experienced builders aiming for meticulous, code-compliant plumbing rough-ins to ensure long-term system integrity.
- What’s Great: Provides a clear, step-by-step guide to laying a robust plumbing foundation, preventing future issues, and ensuring lasting performance.
- What’s Not: Mistakes in this stage are costly and lead to significant problems, demanding precise planning, coordination, and strict code adherence.
- Affiliate Link Present: No
Did you know finishing plumbing rough-in on a new construction project takes around three to five days? This stage forms the backbone of your plumbing setup, but many builders fail to recognize just how crucial it is.
The plumbing rough-in process places pipes inside walls and floors so water flows to fixtures such as sinks, showers, and toilets. Any mistakes here can lead to serious issues long after the construction wraps up. That is why planning plumbing for new builds needs a lot of focus precise coordination, and a solid grasp of local building codes. Skipping these steps can result in big problems down the line.
I’ve spent years working in construction, and one thing I’ve learned is that good plumbing rough-ins aren’t just luck. They come from careful planning and precise execution. That’s why we built this plumbing rough-in guide—to take you step by step through the key parts of the process. Whether you’re a seasoned contractor or starting out on your first project, this guide will help you dodge expensive mistakes and make sure your plumbing system works like it should for a long time.
Image Information
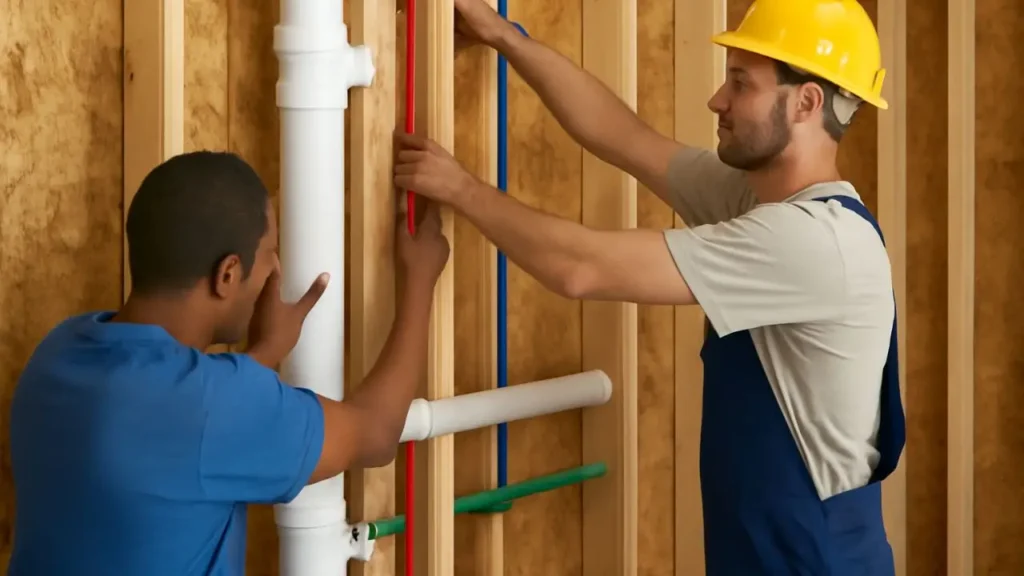
All product images used in this post are provided by the author and claimed to be their own creativity. According to the author, these images are generated and edited with the help of AI. The purpose of his blog post is just to share his information with all of you.
To Understand Rough-In Plumbing in New Construction
Every well-working building begins with what lies below the surface. This is where important pipe systems and connections are set up. Plumbing rough-in for new construction is the first big stage of installing plumbing. It happens after the framing but before any walls are closed off.
Rough-In Plumbing Explained
Rough-in plumbing acts like the backbone of a home’s water system. During this stage, workers install the hidden parts of the plumbing that later get covered by walls, floors, or ceilings. It includes putting in:
- Pipes to bring clean water to each part of the house
- Pipes to take away used water from toilets, sinks, and showers
- Pipes connecting waste to the sewer or septic system
- Vents that let sewer gasses escape and keep water moving
- Valves to shut off water, traps to catch debris, and access points to fix issues later
Plumbing rough-ins lay the groundwork for how your finished plumbing system will work. This step relies on accurate measurements and careful planning to make sure all future fixtures match up with the system underneath.
Where it fits in the plumbing process
Building a plumbing system in new construction happens in three main steps. First is the underground rough-in where sewer and water lines go under the foundation. Then, the aboveground rough-in runs pipes through walls, links vent stacks to the roof, and sets up the internal plumbing routes. The last step is finish plumbing. This happens after walls are done when fixtures get installed and hooked up to the rough-in setup.
Setting up plumbing for rough-in work usually spans three to five days, depending on how big or complicated the job is. This time frame could grow longer if inspections take extra time or if other workers need to coordinate their tasks.
Rough-in vs. Finish Plumbing
The difference between rough-in and finish plumbing is simple yet important. Rough-in deals with the behind-the-scenes work that makes the system run . On the other hand, finish plumbing includes the parts people use and see every day in their homes.
Rough-in plumbing focuses on meeting building codes and laying out the basic design, while finish plumbing deals with looks and practical use. During the rough-in phase, plumbers avoid installing fixtures so inspectors can check the system without obstructions. Once walls are sealed and finished, they return to add sinks, faucets, toilets, and other visible parts.
Knowing how rough-in and finish plumbing fit together shows why careful planning in the early stage is key to a solid and lasting plumbing system.
Planning to Prepare the Rough-In Stage
Careful preparation is vital to setting up plumbing rough-ins in new construction. After framing is done, planning ensures the plumbing works well over time.
Studying blueprints to mark where pipes will go
The first step to plan a plumbing rough-in starts with taking a close look at architectural blueprints. These blueprints act like a guide showing the exact spots for sinks, showers, and toilets. A plumbing rough-in diagram gives a clear image of how drainage and vent pipes will look in three dimensions. It shows connections, pipe sizes, and fittings. On these diagrams dashed lines represent vent pipes, and solid lines indicate water-carrying pipes.
Next, you need to locate and document where vents and drains will go based on the blueprints. This part feels a bit like piecing together a puzzle without knowing what the picture looks like just yet. If you skip the groundwork, there’s a risk of building a plumbing system that doesn’t work .
Teaming up with other trades
Getting plumbing rough-in right means working with other trades on a construction site. Think of it as managing an orchestra. Every piece needs to come together at the right time to create something that works. Coordinating with framers on helps avoid problems like cutting or drilling into spots that could weaken joists.
Picking pipe materials and planning the layout
The choice of pipe materials plays a big role in how the system performs and how much it will cost. Some common options are:
- PVC: It is light, resists rust, and is priced lower.
- Copper: It works well in situations with high pressure or heat.
- PEX: It bends , lasts a long time, and uses fewer connections.
The design of your plumbing system depends a lot on the property’s layout size, and number of levels. To optimize water flow and keep pipes short, planners need to adjust the layout based on these features. It also ensures repairs are easier. Local building codes set rules to follow, like how big pipes should be where fixtures go, and how drainage systems need to work.
Basic Steps to Start Plumbing Rough-In Work
Building a new plumbing system starts with careful planning. This stage turns a detailed design on paper into the pipes and fixtures that make the system work in real life. Accuracy and proper methods are key to this stage.
1. Put in the drain and waste pipes
Start the rough-in by setting up the drain and waste pipes. Begin at the bottom of the slope and move towards the higher part. Make sure the pipes follow the standard slope of ¼ inch per foot so drainage works . Bathrooms often allow 1½-inch pipes for vanity sinks, but using 2-inch pipes reduces the chance of clogs and helps water flow better. Use the right fittings to secure the joints and build a strong system. If pipes are installed , you might run into constant drainage problems.
2. Install the vent stacks and connect them
Next, set up vent stacks to let air move through the system. In colder regions, these pipes might need to measure 2 to 3 inches wide to stop damage caused by snow buildup. Some local laws may say vent pipes must end within 5 feet of the roof’s ridgeline. You also need to build the vents with enough slope to stop moisture from collecting in any part of the system. When set up , a vent system avoids gurgling noises and keeps water flowing .
3. Install water supply lines
Finish installing drainage systems then move on to adding the water supply lines. Many plumbers now prefer using PEX over rigid copper because it bends and takes less effort to install. Stick to the marked spots while working to avoid mistakes. Even though building codes allow you to use ½-inch water lines for an average three-fixture bathroom, running no more than two fixtures on each ½-inch pipe helps keep the water pressure strong.
4. Close off and cap the pipe ends
After putting the pipes in place, cover or seal every open end. Cap supply lines and cover drain lines . Some regions require inspectors to have all drain pipes capped during testing. Capping the pipes keeps out debris and stops sewer odors from getting into the system.
5. Check for pressure and leaks
Make sure you test the whole system before the inspection stage. Keep 5 psi of air pressure in drain-waste-vent systems for 15 minutes straight. Water supply lines need to handle pressure, either at their working level of 80 psi or with 50 psi of air. Close off every valve before running these tests. These checks confirm the system is solid and help spot problems before closing up the walls.
Inspection, Costs, and Final Touches
Once you’ve installed pipes and connections the inspection and prep remain before moving to the final finish stage. These steps are key to checking that your plumbing fits code requirements and will function right for years ahead.
Handling your rough-in plumbing inspection
Most building rules in towns expect you to get a professional inspection of plumbing rough-ins done before closing up walls. I suggest setting up this inspection right after finishing the installation and pressure tests. Inspectors focus on checking things like pipe placement, vents, if the slopes are correct, and whether everything matches local rules. They also make sure water supply lines hold pressure and drain lines have the right slope. Before the inspector arrives, I like to go through everything using a checklist to make sure pipes are secured and supported .
Problems that cause inspection fails
Over my years of working, I’ve noticed tons of avoidable issues that lead to failed inspections. Some of these are common:
- Pipes installed without enough slope to drain water
- Vents that are either placed or not enough
- Pipes that are not secured with adequate support
- S-traps that might lose their water seal and let sewer gas into the house
- Pipe sizes that are wrong leading to poor pressure and drainage
Factors influencing the cost to install plumbing in new construction
The price of rough-in plumbing depends on many different factors. For a 2,000-square-foot house, homeowners spend between USD 8,000 to USD 12,000. Permit fees fall between USD 50 and USD 500, while inspections often cost USD 40 to USD 120 per hour. The type of material used plays a big role in total expenses. PEX is the cheapest option when compared to copper or CPVC.
Steps to finish the plumbing phase
Before you move on to the finishing part of plumbing, make sure you cap all pipe ends and check the fittings to see if they’re secure. This step helps stop any debris from getting into the pipes while the rest of the work wraps up. After walls are closed up and you pass inspections, you can start the finishing stage where you’ll install fixtures and hook them up to the rough-in setup that you planned.
Wrapping It Up
Good rough-in plumbing acts as the foundation of any solid construction project. This guide has walked through the key steps to plan and carry out this stage. Most , knowing the difference between rough-in plumbing and finish plumbing explains why paying close attention during the first phase makes things smoother later.
Thorough blueprint reviews working with other trades, and picking the right materials lay the groundwork for good plumbing work. Sticking to the correct steps, like setting up drain pipes and running pressure tests, makes sure the system works when it’s done.
Inspections are there to keep things safe. Fixing problems stops them from turning into bigger headaches saving both money and effort. Plumbing rough-in might feel expensive upfront, but spending the money now helps avoid huge disasters that could wreck the whole building later.
Working in construction over the years has shown me one thing: good plumbing systems don’t just fall together by chance. They come from smart planning accurate work, and sticking to building rules. Whether you decide to take on the project yourself or bring in experts, this guide will highlight the key principles to help you build plumbing that works well for years to come.
The rough-in phase may get hidden behind walls later, but its importance cannot be overstated. It lays the groundwork for how the plumbing operates down the line. If you put in the effort at this stage, you’ll save yourself future headaches like leaks or expensive fixes.
Key Takeaways
Learn the key steps in this guide to lay a strong plumbing rough-in giving your water system the foundation it needs to run .
- Read the blueprints to plan well. Work with other trades early and pick the right pipe materials before starting the installation.
- Start the installation in the correct order. Begin with the drain and waste lines then install vent stacks, run water supply pipes, secure all connections, and test the pressure afterward.
- Get a professional inspection done right after finishing the work. Many issues can come up, like wrong pipe slopes poor venting, or loose connections that go against building codes.
- Set aside $8,000 to $12,000 for rough-in plumbing in a home of around 2,000 square feet. Be ready to include extra costs to cover permits ($50 to $500) and inspections ($40 to $120 per hour).
• Keep in mind that the quality of a rough-in has a huge effect on how well the system works in the long run. Spending 3 to 5 days to do it can prevent pricey repairs later and keep the system running for years.
Though the rough-in process is often tucked away behind walls, its accuracy has an effect on how well your plumbing system works how efficient it is, and how long it lasts. Put in the time and care this step requires to save yourself from problems and high costs down the road.
FAQs
Q1. What does plumbing rough-in mean, and why does it matter? Plumbing rough-in marks the first stage of setting up plumbing done after framing but before closing up walls. Plumbers install hidden parts like water pipes, drains, and vents during this step. It serves as the base of the plumbing system and plays a key role in making sure everything works in the long run.
Q2. How many days does plumbing rough-in take? Plumbing rough-in for a new build lasts about three to five days. The time frame depends on factors like the project’s scale how complicated the work is, inspection schedules, and how well tradespeople sync their tasks.
Q3. What are the main steps involved in the plumbing rough-in process? The plumbing rough-in process involves several important steps. First, workers install drain and waste pipes. Next, they add vent stacks along with their connections. They run the water supply pipes then secure and cap all pipe ends. , they do pressure checks and test for leaks. Each task needs careful work and must follow building codes.
Q4. What is the cost of plumbing rough-in for new construction? Plumbing rough-in for a 2,000-square-foot house costs between $8,000 and $12,000. Permit fees add another $50 to $500, and inspection charges range around $40 to $120 an hour. The type of materials used, like PEX versus copper pipes, has a big influence on the total cost.
Q5. What causes plumbing rough-ins to fail inspections? Plumbing rough-ins often fail inspections because of problems like pipes not sloping for drainage, vents being missing or installed wrong, pipes not being secured with supports using S-traps that let sewer gas into homes, or sizing pipes wrong, which messes up water pressure and drainage flow. Fixing these problems ahead of time helps prevent delays and extra expenses.